How to Do a Dutch Braid: A Step by Step Guide for Beginners
Learning how to do a Dutch braid is a useful skill for anyone who wants to create a neat, raised hairstyle. This braid is often called a reverse French braid because the strands cross under each other instead of over.
The result is a braid that stands out from the head, making it perfect for casual days, workouts, or special events.
In this guide, you will learn simple techniques, common mistakes to avoid, and tips for keeping your braid secure all day.
What is a Dutch Braid?
A Dutch braid is a three strand braid that starts at the top of the head and works downward.
Unlike a French braid where the sections cross over the middle strand, a Dutch braid crosses the side strands under the middle strand.
This action creates a braid that pops up from the scalp. Many people call it a “boxer braid” when done as two braids on each side of the head.
Essential hair tools for braiding include:
– A wide tooth comb or paddle brush
– Small hair elastics that match your hair color
– Hair clips to hold sections in place
– A spray bottle with water to dampen flyaways
– Styling gel or hair wax for grip
Step by Step Guide on How to Do a Dutch Braid
Step 1: Prepare Your Hair
Start with dry or slightly damp hair. Clean, tangle free hair makes braiding much easier. Brush your hair thoroughly to remove all knots and tangles.
If your hair is slippery or fine, apply a small amount of texturizing spray or dry shampoo. This adds grip and prevents the braid from slipping loose.
Step 2: Section the Top Part
Use your comb to create a clean part. You can choose a center part or a side part. Gather a triangle shaped section of hair at the crown of your head.
This section should be about two inches wide from your forehead to the top of your ear. Clip the rest of your hair out of the way.
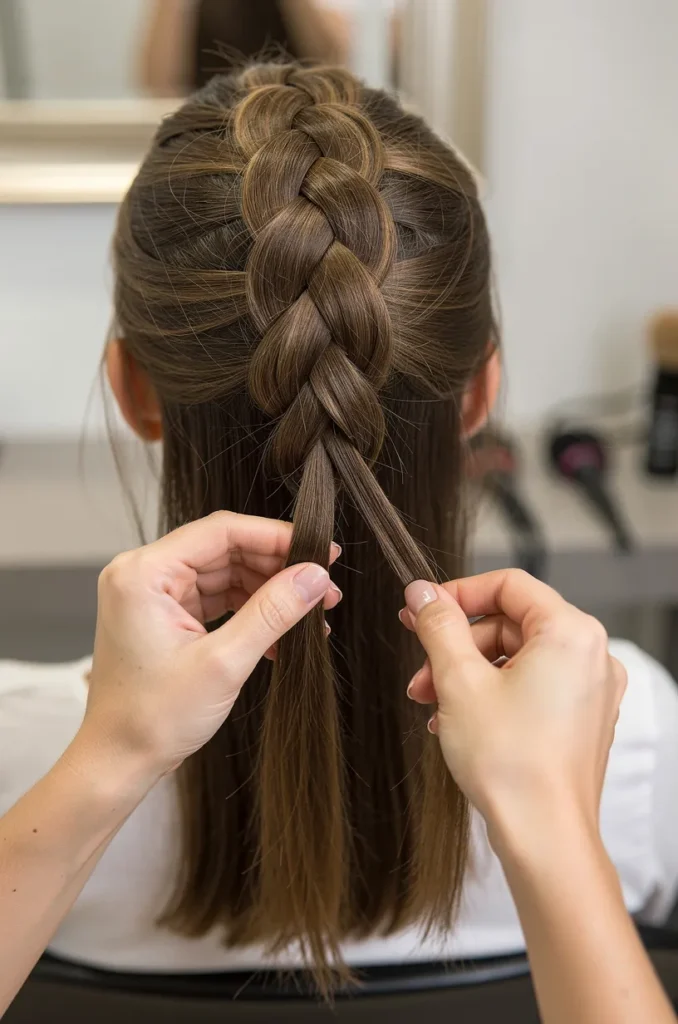
Step 3: Divide into Three Strands
Split this top section into three equal strands. Hold the left strand in your left hand, the middle strand in your fingers, and the right strand in your right hand. This is the same starting position as a regular three strand braid.
Step 4: Begin the Underhand Braid
Take the right strand and cross it under the middle strand. The right strand becomes the new middle strand. Then take the left strand and cross it under the new middle strand.
The left strand now becomes the middle strand. This is the key difference from a French braid. Always cross the outer strands under the center strand.
Step 5: Add Hair to Each Section
Now you will add more hair to each strand before crossing it under. Take the right strand and gather a small section of hair from the right side of your head.
Add this new hair to the right strand. Then cross the right strand under the middle strand. Repeat on the left side.
Gather a small section from the left side, add it to the left strand, and cross it under the middle strand.
Important tip: Keep the added sections small and even. This creates a neat, uniform braid. Pull the strands tight after each cross to keep the braid snug against your scalp.
Step 6: Continue Down the Head
Repeat the process of adding hair and crossing under. Work your way down the back of your head.
Stop adding new hair when you reach the nape of your neck. At this point, you will have all your hair included in the braid.
Step 7: Finish with a Regular Braid
Once you have no more loose hair to add, continue with a regular three strand braid. Cross the right strand under the middle, then the left strand under the middle.
Braid all the way to the ends of your hair. Secure the end with a small elastic.
Step 8: Adjust and Set the Braid
Gently tug on the outer edges of the braid to add volume. This is called “pancaking” the braid. Pull each loop slightly outward to make the braid look wider and more textured. Spray a light hold hairspray to keep flyaways in place.
| Braiding Step | Action | Common Mistake |
|---|---|---|
| Start | Divide top section into 3 strands | Sections too big or uneven |
| First cross | Cross right under middle | Crossing over instead of under |
| Add hair | Gather small side sections | Adding too much hair at once |
| Tension | Pull strands tight | Braid too loose or too tight |
| Finish | Regular braid to ends | Stopping too early before elastic |
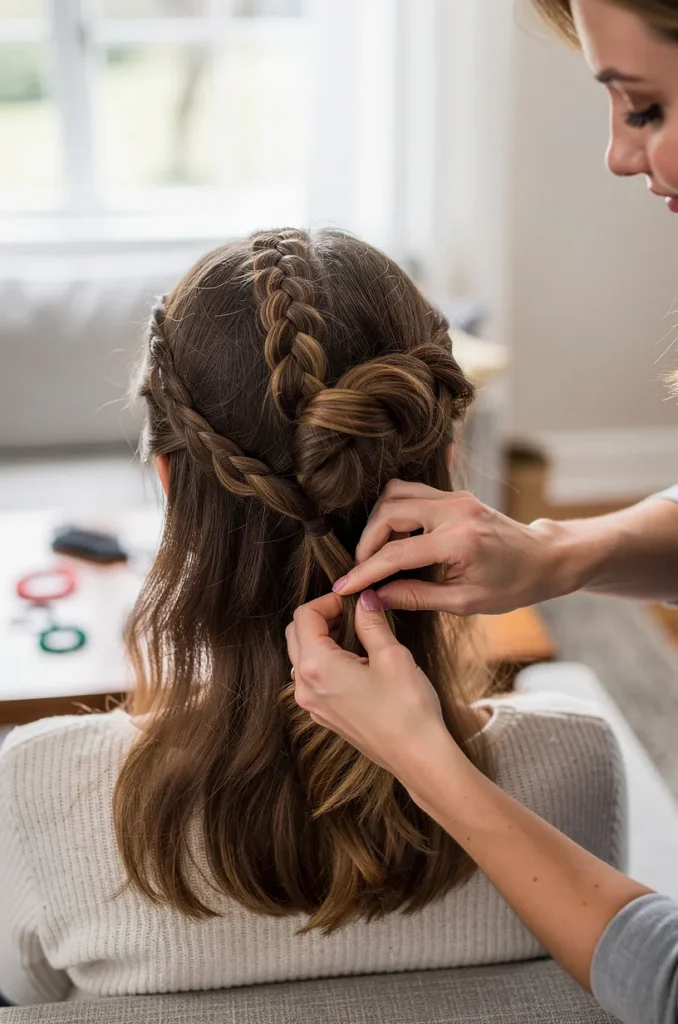
Dutch Braid Variations to Try
Two Dutch Braids (Boxer Braids)
Split your hair down the middle. Braid each side separately using the same underhand technique. Boxer braids are popular for gym workouts because they keep hair off the face and stay secure during movement.
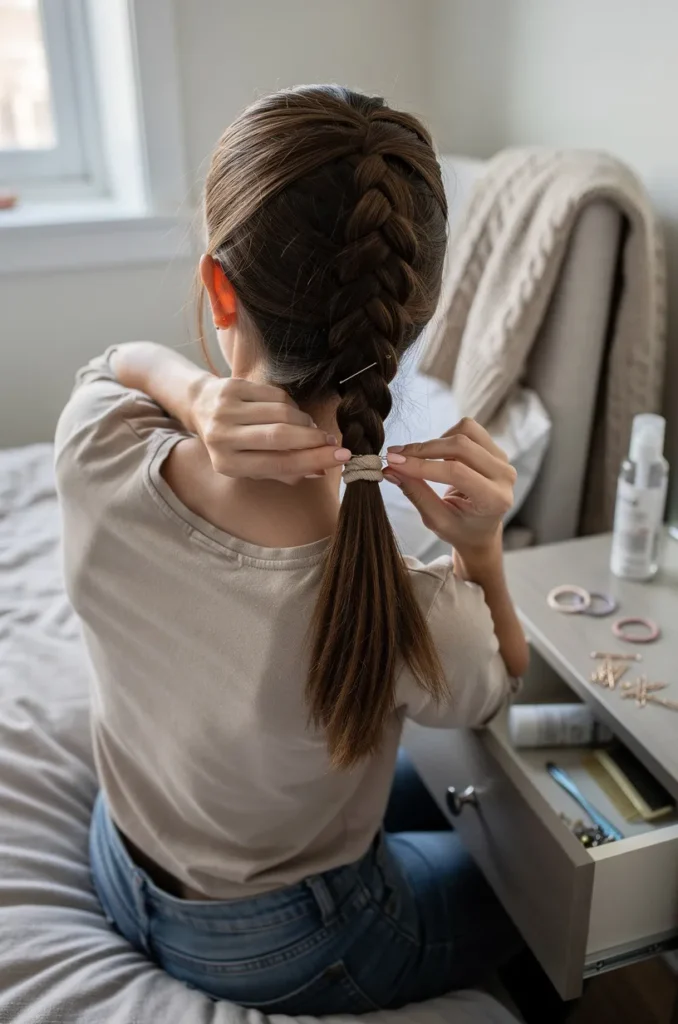
Dutch Braid Ponytail
Braid the top half of your hair in a Dutch braid. Stop at the crown and gather all hair into a high ponytail. This style gives you the raised braid look with the ease of a ponytail.
Dutch Braid Crown
Start the braid behind one ear and work across the top of your head toward the opposite ear.
Continue braiding down the other side and tuck the end under the starting point. Use bobby pins to secure the braid in a halo shape around your head.
Common Mistakes When Learning a Dutch Braid
Mistake 1: Crossing Over Instead of Under
The most common error is treating the Dutch braid like a French braid. Remember that the outer strands always go under the middle strand. If your braid looks flat or sunken, you are likely crossing over.
Mistake 2: Adding Too Much Hair
Large sections of added hair make the braid lumpy and hard to manage. Take small, even pieces each time. This keeps the braid smooth and allows you to see the raised pattern clearly.
Mistake 3: Uneven Tension
Loose braids fall apart quickly. Tight braids can cause discomfort and headaches. Practice pulling the strands with consistent, moderate tension. The braid should feel snug but not painful.
Mistake 4: Skipping the Part
A clean part makes the braid look professional. Use a comb to create a straight line. Messy parts can make the braid look crooked or lopsided.
Tips for Different Hair Types
Fine or Thin Hair
Add texture with dry shampoo or sea salt spray before braiding. These products give your hair more grip and help the braid hold its shape. Avoid heavy oils or creams that make hair slippery.
Thick or Curly Hair
Thick hair holds a Dutch braid very well. You may need to use larger sections to avoid a braid that is too bulky. Work with slightly damp hair to control curls and reduce frizz.
Straight Hair
Straight hair can be slippery. Use a small amount of styling gel on your fingers before handling each section. This gives you better control and prevents strands from sliding apart.
How to Keep a Dutch Braid Secure All Day
- Use a high quality elastic that will not break or stretch
- Apply hairspray after braiding to lock in the style
- Sleep with a silk scarf or bonnet to prevent frizz
- Touch up the braid in the morning by pulling the loops gently
- Avoid touching the braid too much during the day
When to Use a Dutch Braid
This braid works well for many situations. Wear it to the gym, to work, or to a formal event. The raised design makes it stand out, while the secure structure keeps your hair controlled. Dutch braids also protect hair from tangles and breakage, making them a good choice for overnight styling.